Desde fotografía macro abstracta hasta colores primaverales brillantes en Instagram, la fotografía de flores está en todas partes. No todo es genial. En este tutorial paso a paso, le mostraremos cómo hacer que sus fotos de flores pasen de ser buenas a excelentes con algunos trucos sencillos de Lightroom para editar fotografías de flores.
No nos malinterprete, ninguna cantidad de edición puede salvar una mala foto. Pero algunos buenos consejos de edición y algunos ajustes sencillos pueden hacer que una buena foto brille aún más.
Table of Contents
1. Elija la mejor imagen de flor para editar
Cuanto mejor sea la imagen inicial de la fotografía de flores, mejores serán los resultados.
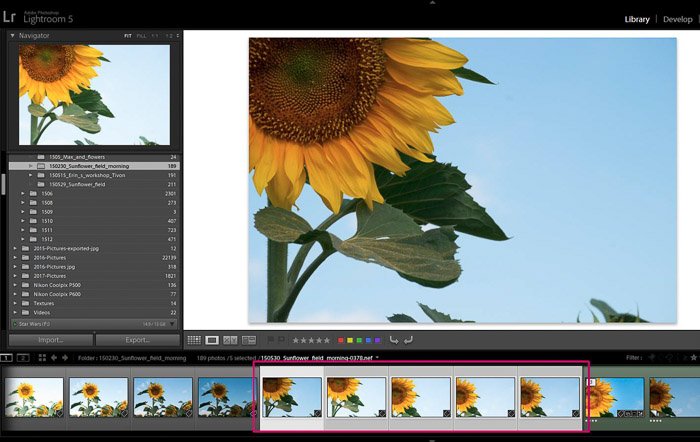
El módulo de biblioteca de Lightroom le brinda la opción de comparar fácilmente un grupo de imágenes. Para hacerlo, primero seleccione todas las imágenes. Puede hacerlo presionando Ctrl (Windows) o Comando (Mac) mientras hace clic en cada uno de ellos.
Luego, en la barra de herramientas inferior del módulo Biblioteca, haga clic en el símbolo Vista de encuesta (o use el atajo “N”).
Si no ve este icono en la barra de herramientas, puede hacer que aparezca marcando «Modos de visualización» en el menú desplegable.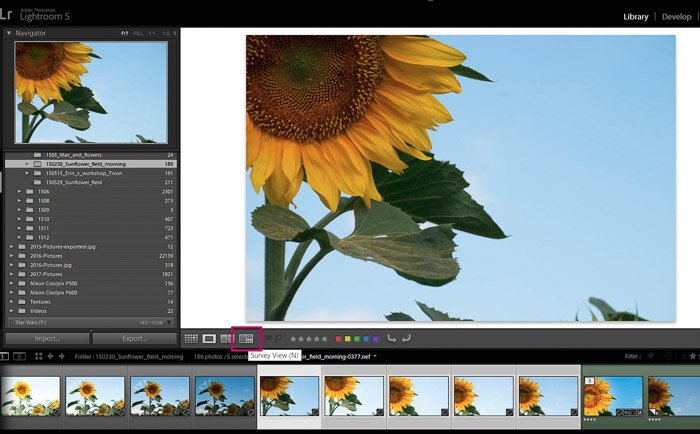
Usando este modo de vista, Lightroom le mostrará todas las fotos seleccionadas a la vez.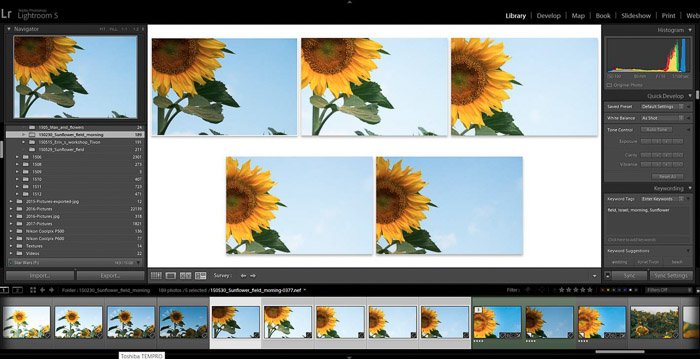
Aquí puede descartar las fotos una por una haciendo clic en la pequeña cruz en la esquina de cada foto hasta que le quede la foto en la que desea trabajar.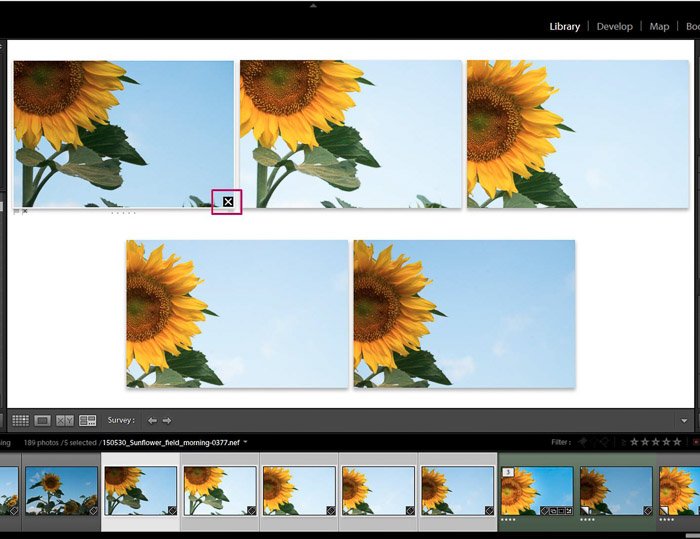
Me gusta marcar mis favoritos con una estrella (pulsando “1”). Al hacerlo, podrá distinguir entre sus fotos elegidas y el resto de sus fotos en la galería.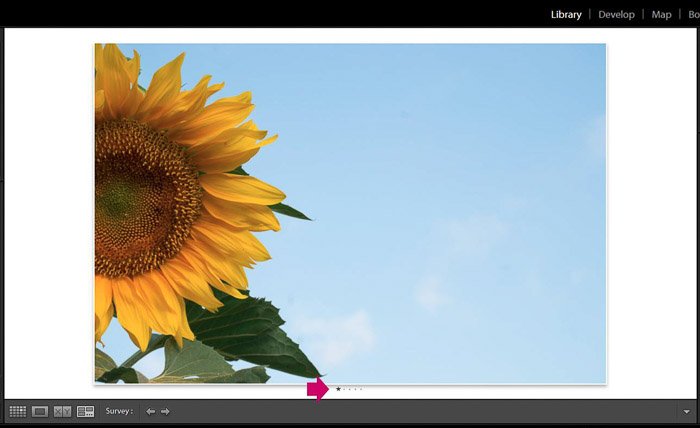
2. Ajustes globales primero
Al editar su imagen, es mejor comenzar con los ajustes globales y luego hacer los locales si es necesario (como pinceles, eliminación de manchas o filtros graduados).
Encontrará los ajustes generales en el primer panel derecho del módulo Desarrollar.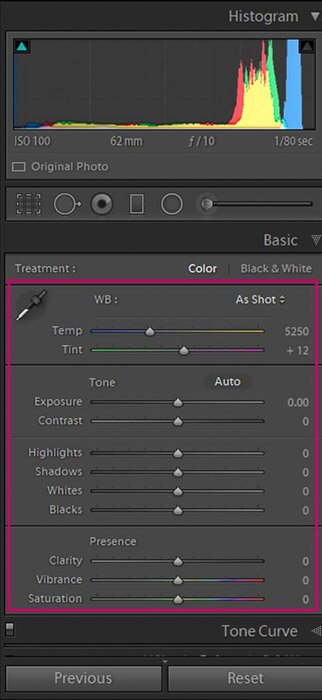
Funciona muy bien para seguir el orden que sugiere Lightroom: balance de blancos (WB para ajustar la temperatura del color), tinte, exposición, contraste, etc. No tienes que usarlos todos.
Encuentro útil repasar los diferentes elementos uno por uno y decidir si me gusta la imagen tal como está o si necesita alguna modificación.
Normalmente aumento la exposición, agrego un poco de contraste y disminuyo los reflejos.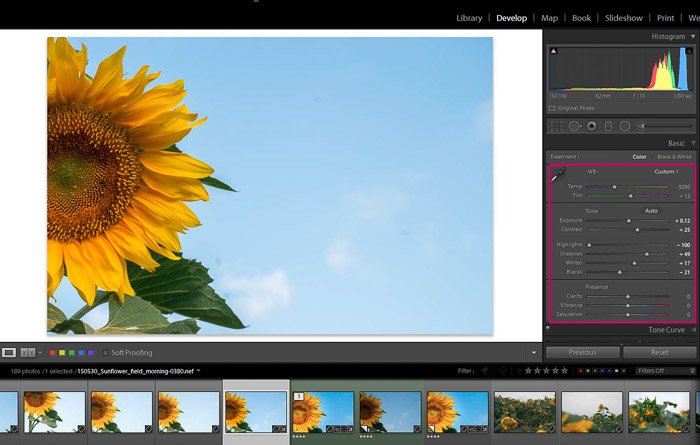
Puede comparar su imagen de antes y después haciendo clic en «Ciclo entre vistas de antes y después» en la barra de herramientas inferior.
Puedes ver que con solo unos pocos ajustes puedes mejorar bastante tus fotos de flores.
Sin embargo, cada foto es un poco diferente y los ajustes también dependen de su gusto personal, así que siéntase libre de experimentar con cada control deslizante en este panel.
3. Resalta los colores
Los colores tienen un papel importante en la fotografía de flores. Puede realizar ajustes globales interesantes en los colores de su imagen utilizando los controles deslizantes Intensidad y Saturación.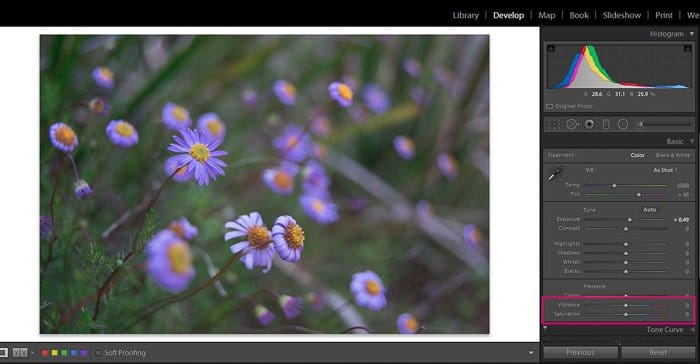
Al mover el control deslizante Saturación hacia la derecha, puede aumentar la intensidad del color en toda la imagen.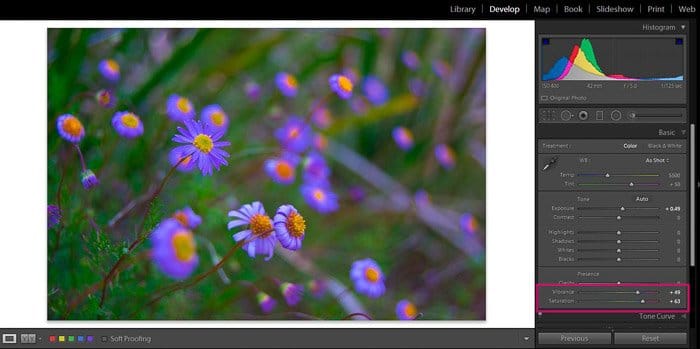
Como puedes ver en este ejemplo, aumenté la intensidad de los morados, amarillos y verdes. Para un efecto más sutil, puede usar el control deslizante Vibrance en su lugar.
Si lo hace, aumentará la intensidad solo de los colores más apagados de la imagen.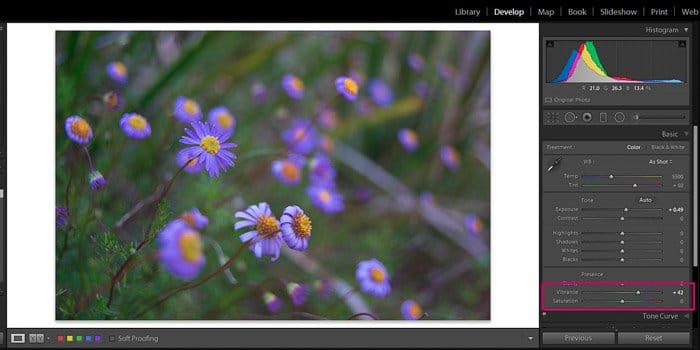
En este ejemplo, aumenté el morado de las flores porque era el color más apagado. El verde y el amarillo permanecieron igual.
Tenga cuidado con estos dos controles deslizantes. Exagerar la intensidad del color le dará a la imagen una apariencia artificial (ver más abajo). Recomiendo ajustes moderados aquí.
También puede disminuir la Saturación y/o la Intensidad para obtener el efecto contrario y atenuar los colores. Esto le da a la imagen un aspecto más delicado.
Tenga en cuenta que mientras edita con estos dos controles deslizantes, está realizando cambios globales. Afectarán a toda la imagen y no tendrás mucho control sobre los colores individuales.
Si quieres tener más control, sigue leyendo.
4. Ajuste los colores individualmente
En algunas fotos, es posible que desee modificar algunos colores específicos y mantener otros intactos. Para estos, los controles deslizantes de Intensidad y Saturación no son suficientes.
Afortunadamente, Lightroom tiene un panel especial para modificar los colores uno por uno: el HSL/Color/B&W.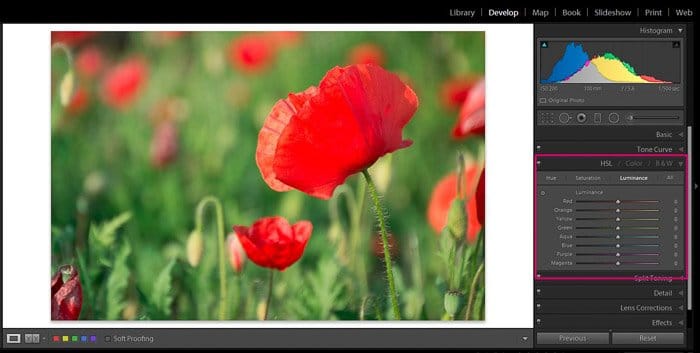
En la sección HSL, puedes modificar la luminosidad (brillo), la saturación e incluso el matiz de cada color individualmente. Estos ajustes pueden tener un efecto profundo en su imagen.
Por ejemplo, en esta foto pude mostrar la flor con más detalle bajando el brillo del color rojo. Seleccioné el panel de Luminancia y disminuí el valor rojo.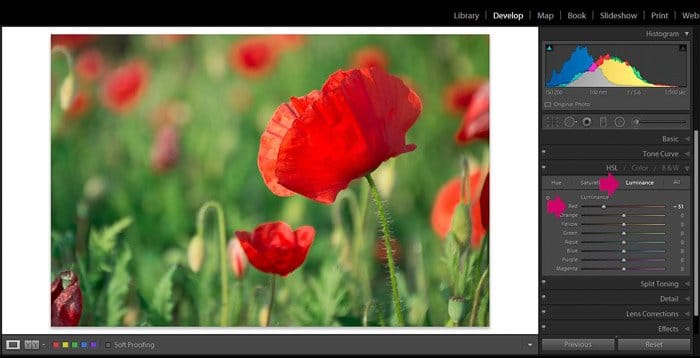
También quería aumentar la intensidad de los verdes, así que me moví al panel de Saturación y trabajé solo con los verdes.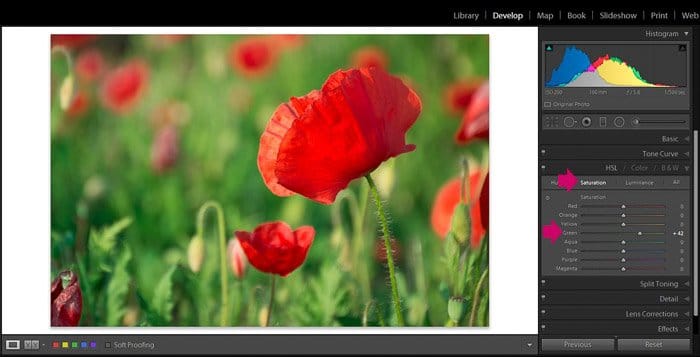
Esta opción de edición de Lightroom le permite mucho más control sobre los colores que los ajustes globales.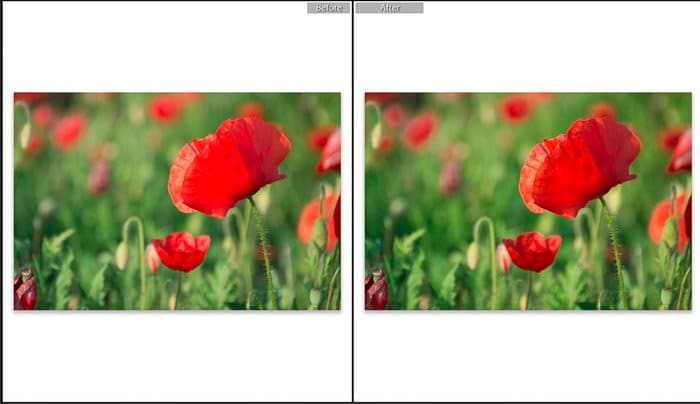
5. Enfatice la textura o la suavidad con claridad
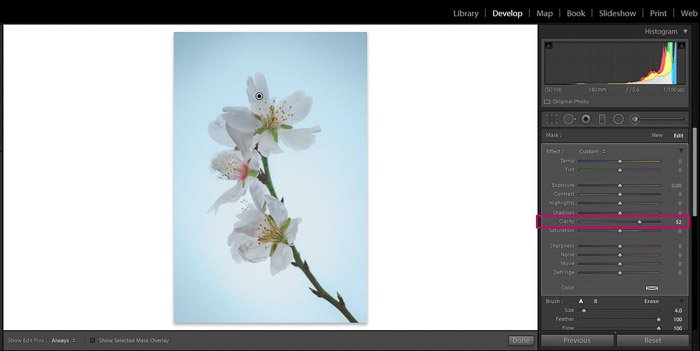
Utilizo el control deslizante Claridad para dar a las flores un aspecto más suave o más duro. Este control deslizante afecta el contraste de los tonos medios. Al aumentar la claridad, puede resaltar los detalles y, al disminuirla, puede suavizar las texturas.
Aunque hay un control deslizante Claridad en el panel de ajustes generales, como todos los demás ajustes globales, cambiará la claridad de toda la imagen. Si desea trabajar en una flor en particular, le recomiendo que trabaje en su claridad localmente con una herramienta de pincel.
Para hacerlo, primero debe seleccionar la herramienta Pincel.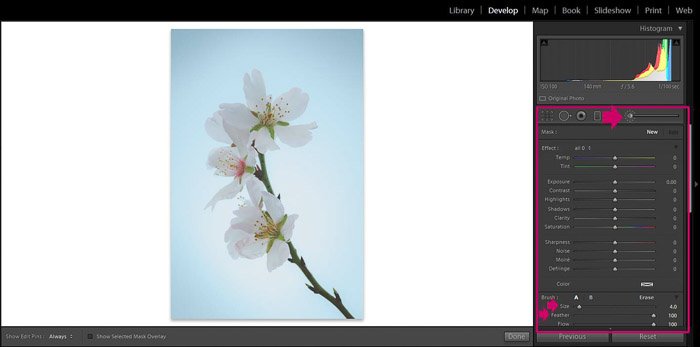
Puede ajustar el tamaño del pincel usando la corredera o con las teclas de corchetes «]» y «[” in order to make the brush bigger or smaller. I always recommend to feather the brush to avoid sharp edges.
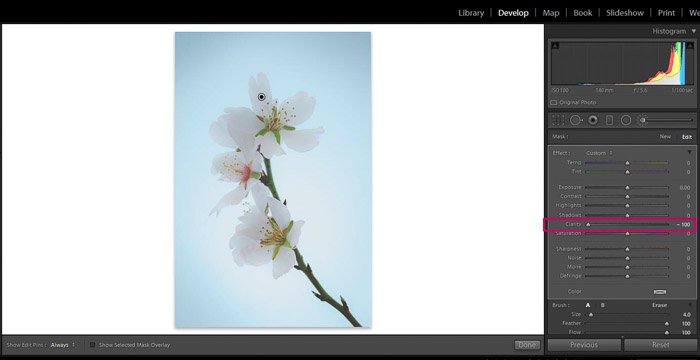
Adjust the Clarity slider of the brush to get the effect you want: to the left for softening the area and to the right to bring out details and texture.
Now all you need do is to paint over the parts of the flower you want to modify. When you do that, the area you brush will be marked in red. This is meant to help you see the area that you covered with the brush tool. When you finish with the brush it will disappear, leaving only the adjustments you wanted to do.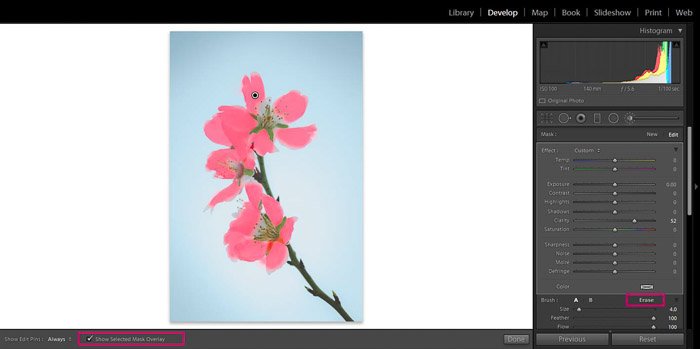
6. Adjust the Exposure With Radial Filters
The human eye has a natural tendency to look at the lighter parts of an image first. For that reason, making your flower look lighter will make it more eye catching.
To do so you can either increase the exposure of your flower or make the background darker. To achieve either of these effects you need a radial filter.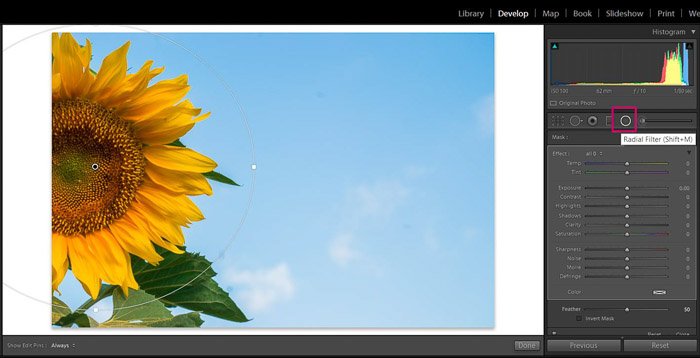
To make the flower lighter just add a radial filter and check the Invert Mask. Now all the adjustment you make to the filter will affect the area inside it.
Feather it to make the effect look more natural and increase the exposure a little.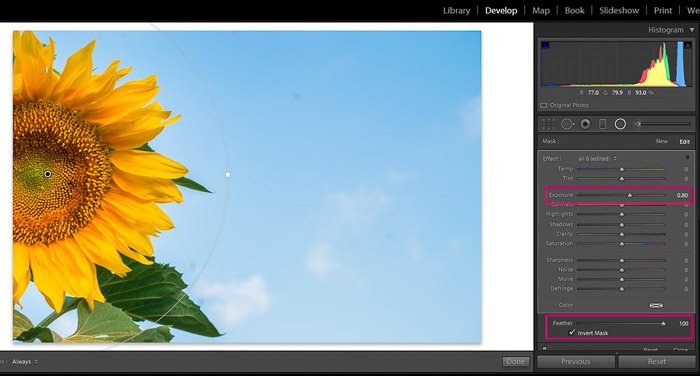
To darken the background, you add a radial filter in the same way but this time you leave the Invert Mask unchecked. Now the changes will affect everything outside the filter.
Decrease the exposure and there you have it!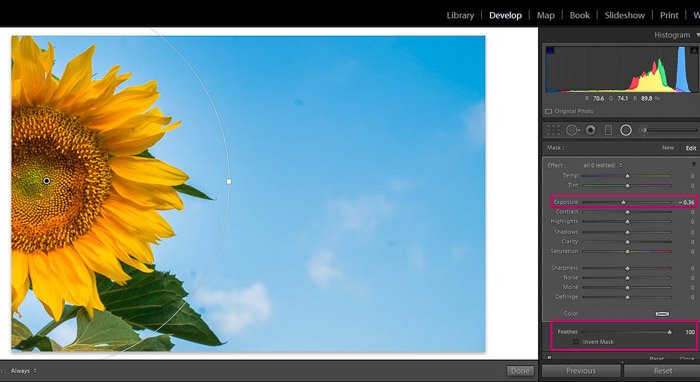
7. Add a bit of Bokeh
As I said in the previous tip, the lighter parts of an image are eye catching. But this is not the only way to attract the viewer’s attention to a certain part of the photo.
We also prefer sharper and well defined areas over blurry ones. In flower photography this concept is really useful. You can isolate a certain flower or a part of it from the rest of the image by making it look sharper.
This is ideally done when you take the photo by shooting with a low aperture number (to get a narrow depth of field) and get this beautiful bokeh effect in the background.
If, for any reason you were unable to take the photo this way, you can add blurriness with some Lightroom editing, although with some limitations.
Let’s take this photo: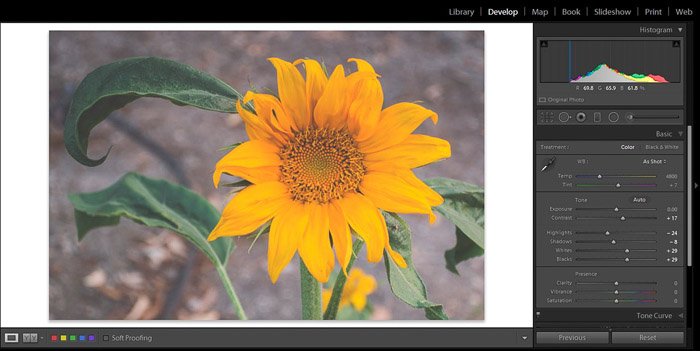
The easier way to do it is by adding a radial filter to adjust the sharpness. Make sure that it is feathered and that the box Invert Mask is unchecked.
Feather it at around 50 and move the sharpness slider to the left until you get the effect you like.
In this photo I was able to move the slider completely to the left, but be careful. In some cases it will be too much and the effect will look artificial.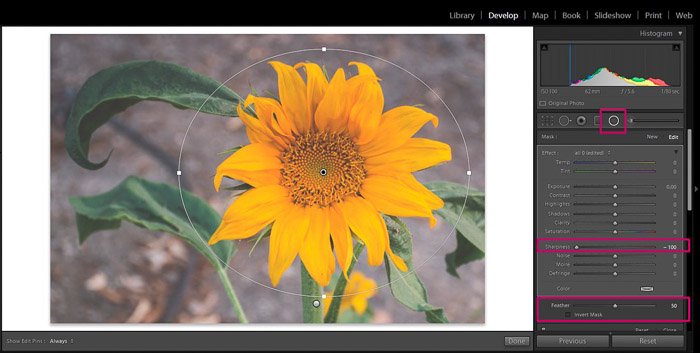
8. Add a Matte Effect
You can easily achieve a nostalgic matte effect by making some adjustments to the Tone Curve. First of all, click on the curve at around 30-40% to set a fix point.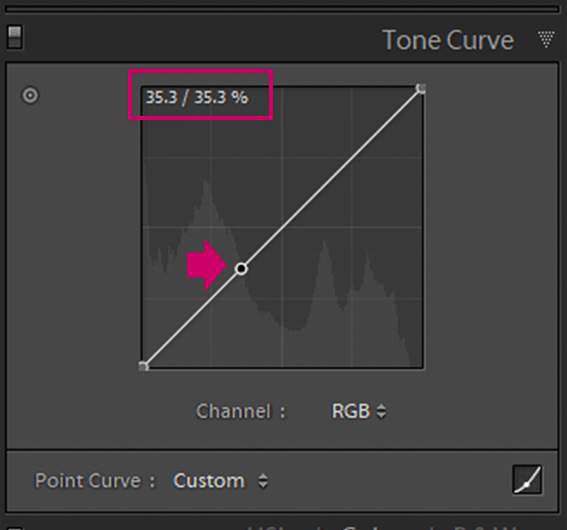
Then, drag the black extreme of the curve (bottom left) upwards.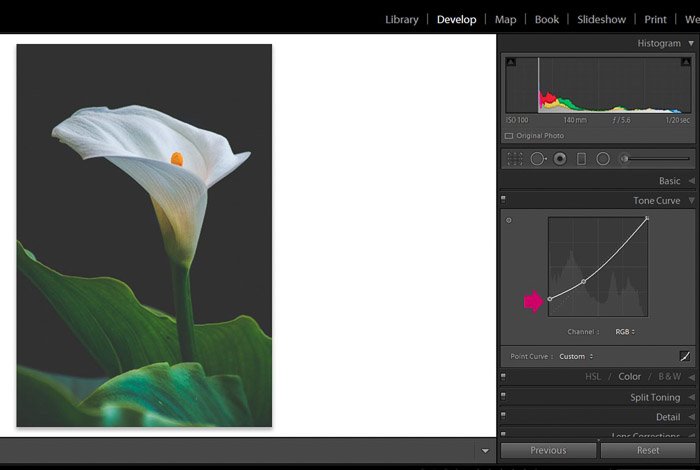
The higher the point, the more washed out the blacks will look. The exact adjustments will depend on your personal taste.
I recommend not to overdo it to avoid clipping the blacks too much (look at the example below).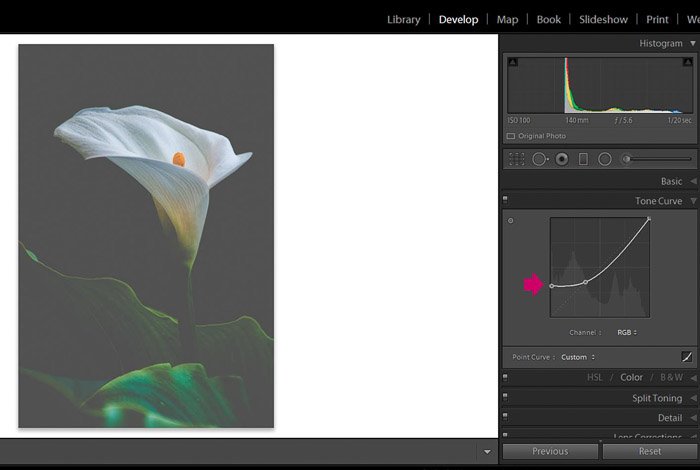
After modifying the curve you can also give the photo a more vintage look by adding colours to the shadows and to the highlights.
You can do that in the Split Toning panel.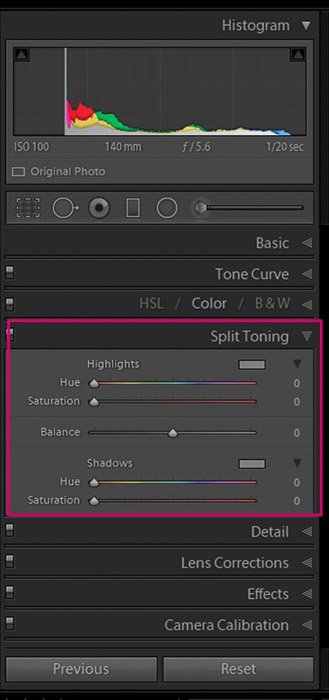
You can add colour to the shadows by selecting it with the eye drop and modifying its saturation.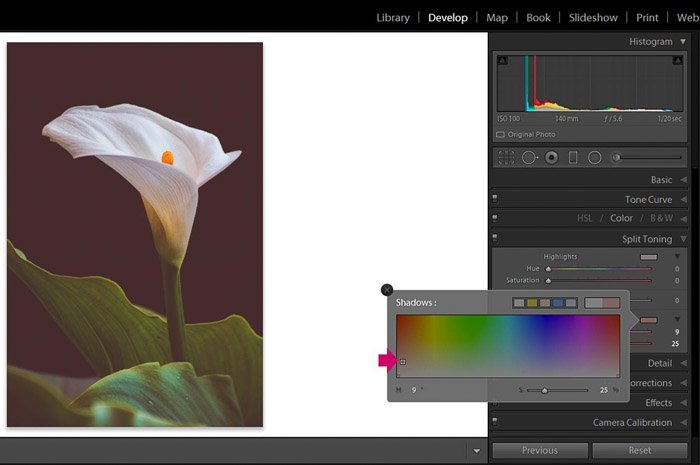
In the example above I used red for the shadows. In the same way you can select a different colour for the highlights.
In the next example I chose orange.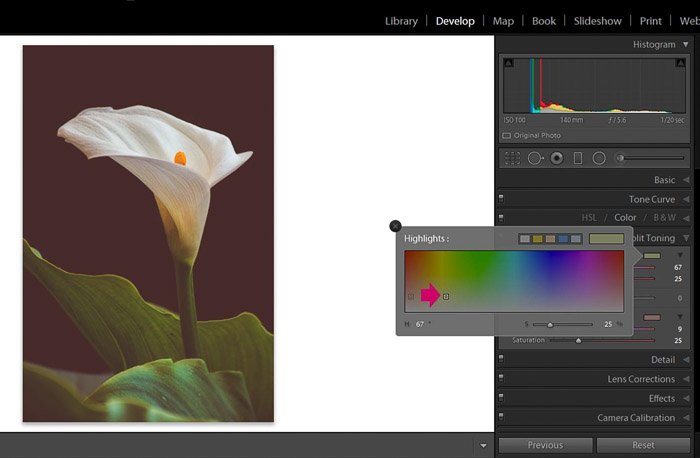
Try different colour combinations until you find the one you like the most. I like this red-orange because it gives a nostalgic look to the image.
See the difference between the original image and the edited version: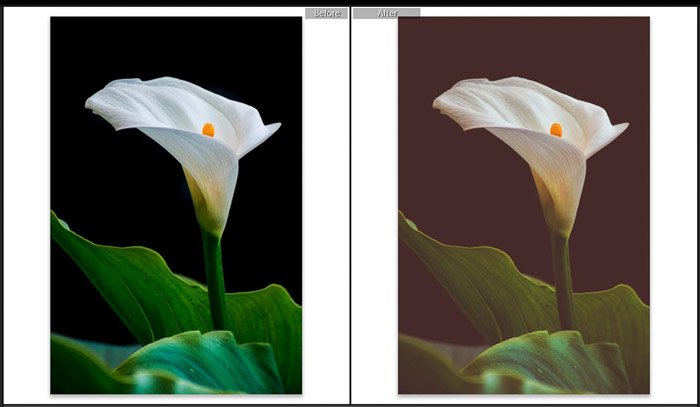
9. Delete Imperfections With the Spot Removal Tool
Sometimes you might get some dust or smudges on your lens or the sensor that then show up in your image. In this case, the dirt usually appears as dark spots in the image.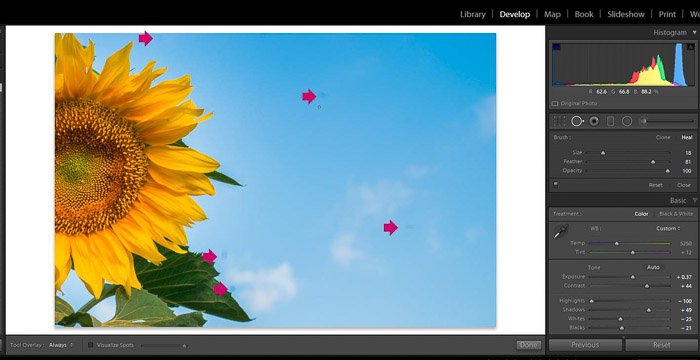
You can clean them using the spot removal tool. There is a way to make the spots easier to spot.
Once you are in the spot removal tool, check the box “Visualize spots” on the bottom tool bar and move the slider towards the right until you get to a point where you can see just the borders of the image.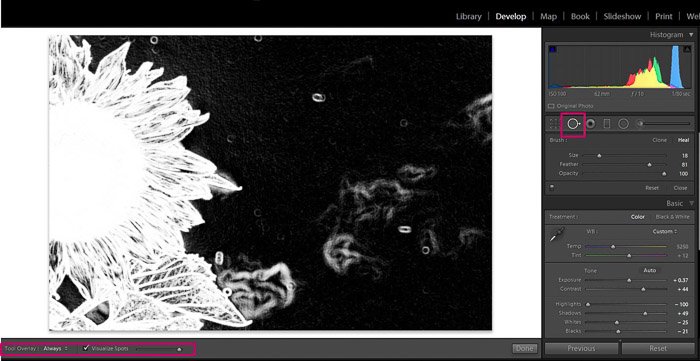
Now you can select the dirt spots with the spot removal tool. You can adjust the size using the slider on the panel or with the shortcuts “]» y «[“.
I like to use it as “Heal” and not as “Clone” because the last one might be quite noticeable. The healing option is more delicate and looks much more natural.
Once you click on the spot you want to remove, this tool will copy an area that Lightroom considers suitable. You can always drag the area from where Lightroom copied it and select a different area you think will work better. Repeat for each dust spot.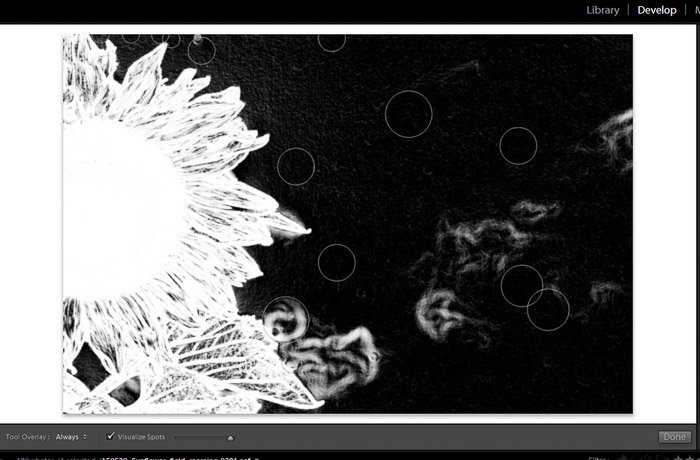
Once you are done the image will be totally spot free!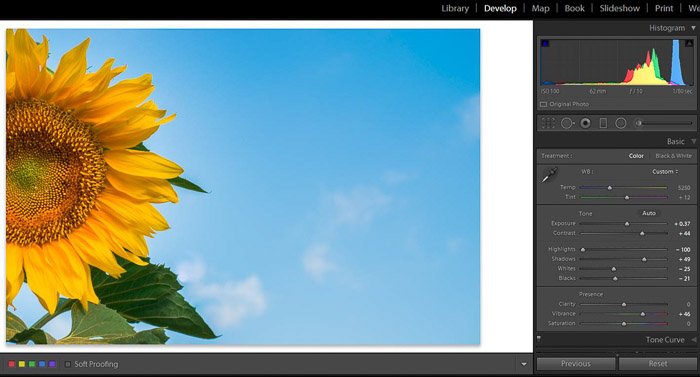
Conclusion
Adobe Lightroom is a great tool for doing quick edits and adjustments to your flower photography. Start with any global adjustment you need and then do the local ones.
Regarding colours, individual adjustments give a lot of versatility to the process. To emphasise a particular flower, you can make it look lighter or you can try to blur its background and add bokeh with a radial graduate tool. Get a bit more creative by adding a matte effect or colours to the shadows and highlights.
Editing is very much a matter of personal style, so feel free to experiment and have fun!
We have a great tutorial on luminosity masks for digital blending you should check out too. Don’t have Lightroom? Check out our article on Lightroom alternatives here.