Es fácil sentirse abrumado por la cantidad de comandos que tiene Adobe Photoshop. Es por eso que hemos reunido esta lista de 20 accesos directos de Photoshop para fotógrafos.
El uso de los atajos de teclado de Photoshop acelera el flujo de trabajo de edición, así que siga leyendo. Y agregue este artículo a favoritos para referencia futura.
Table of Contents
1. Atajo de nueva capa de Photoshop
Si hay algo que caracteriza a Photoshop es su flujo de trabajo basado en capas.
Puede crear una nueva capa con el atajo Shift + Ctrl + N (Ventana) o Shift + Cmd + N (Mac).
Aparecerá un panel de diálogo donde puede cambiar el nombre de la nueva capa. También tienes opciones como opacidad, color o modo de fusión.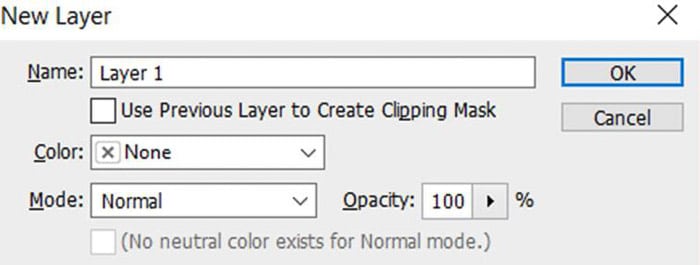
Si usa la configuración predeterminada, su nueva capa será transparente en blanco.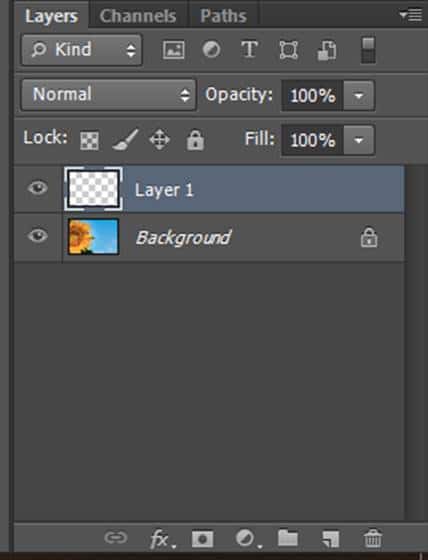
2. Atajo de capa duplicada
Cuando abre su imagen para editarla en Photoshop, es muy recomendable que cree una copia de su capa de fondo (también conocida como su imagen).
Esto le permitirá trabajar en esta copia y no directamente en la imagen. Hace que tu flujo sea menos destructivo. Siempre puedes eliminar esta capa y tu imagen permanece intacta.
Puede crear copias de cualquier capa que necesite, no solo la de fondo.
Para hacerlo, presione Ctrl + J (Windows) o Cmd + J (Mac). Solo asegúrese de haber seleccionado previamente la capa desde la que desea crear la copia.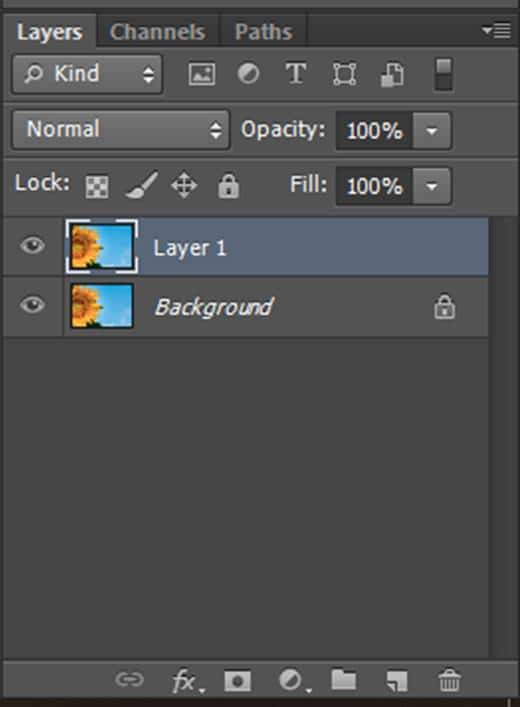
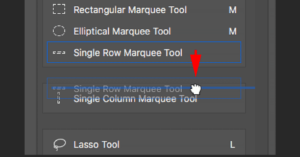
3. Acceso directo a la herramienta Marquesina
La herramienta Marco se utiliza para seleccionar áreas de una imagen con una forma determinada. Utilice el atajo M para acceder a la herramienta Marco rectangular.
Presione Shift + M para cambiar entre esta y la forma elíptica. Luego puede seleccionar el área deseada en la imagen.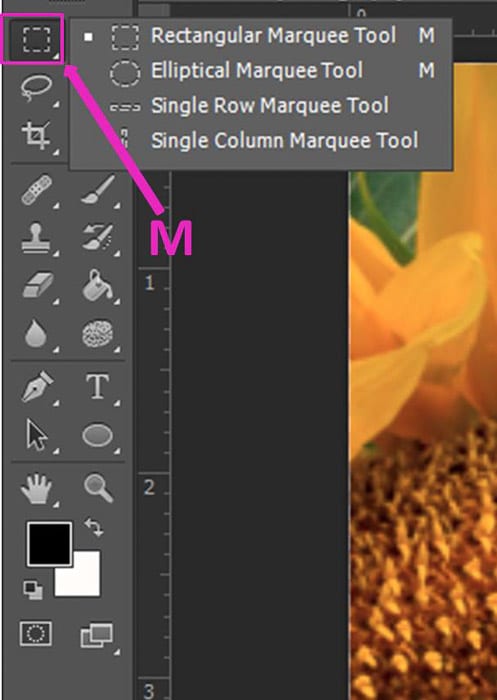
Si lo que necesita es un círculo perfecto, seleccione la herramienta Marco elíptico y mantenga presionada la tecla Mayús mientras arrastra su selección.
4. Acceso directo a la herramienta Lazo
La herramienta Lazo se utiliza para seleccionar un área libre de su imagen (no una forma geométrica).
Cuando usa el atajo L por primera vez, selecciona la Herramienta Lazo Básico.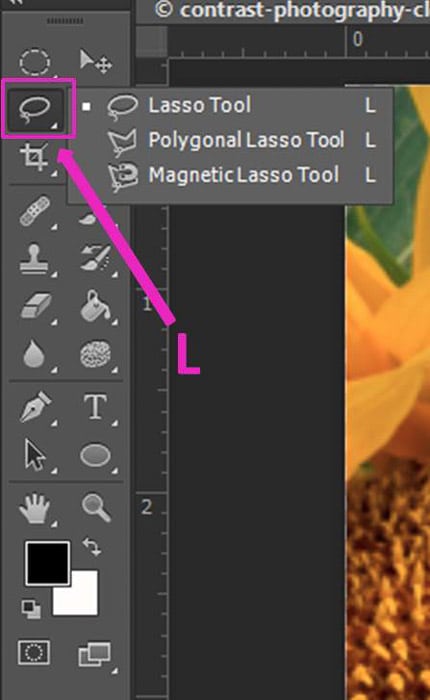
Con esta herramienta puede seleccionar áreas libremente. Para crear líneas rectas, presione la tecla Alt / Opt mientras dibuja.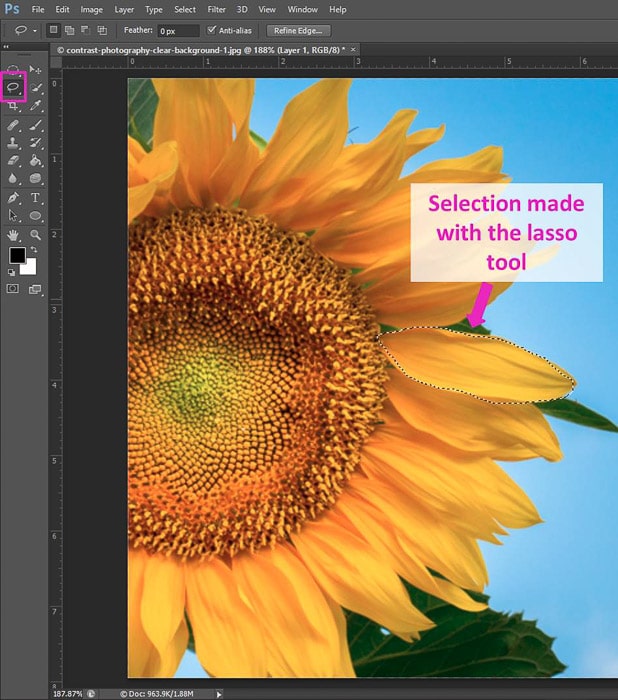
Al presionar Mayús + L repetidamente, puede cambiar entre la herramienta Lazo básico y otras dos opciones: la herramienta Lazo poligonal y la herramienta Lazo magnético.
El lazo poligonal te permite crear ángulos agregando puntos en cada clic que haces en la imagen.
La herramienta Magnética es ideal para seleccionar bordes (áreas con gran contraste).
Haga clic en el punto de inicio de la selección y mueva el mouse. Verá que la línea de selección envuelve el borde y Photoshop agrega puntos.
También puede agregar puntos haciendo clic con el mouse. Si comete un error, puede eliminar los puntos con el botón Eliminar.
Para completar la selección, debe llegar al primer punto y cerrar el área de selección.
6. Acceso directo a la herramienta Pincel
El atajo de la herramienta Pincel es B. Al presionar Mayús + B, puede cambiar de la herramienta Pincel a la Herramienta Lápiz, la Herramienta Reemplazo de color y la Herramienta Pincel mezclador.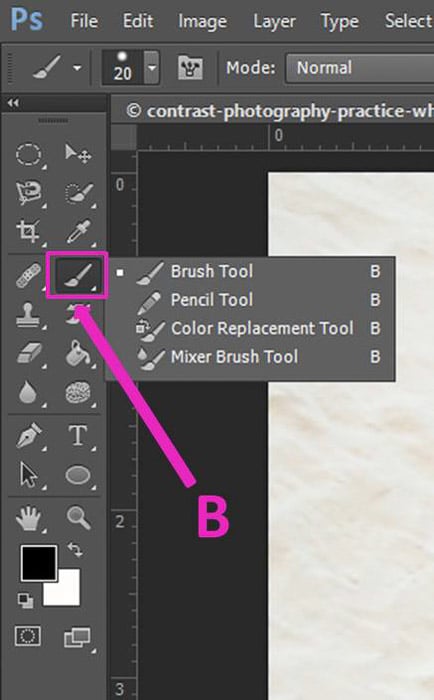
También hay un atajo de tamaño de pincel de Photoshop.
Pulsando]lo agranda y pulsando [ you make it smaller.
7. Change Background/Foreground Color With a Shortcut
This is especially useful while working with masks. That’s when you need to paint in either black or white to modify the mask area.
It is easy to switch between these two colors by pressing X. The only caveat is that you need to have the background and foreground colors set to black and white.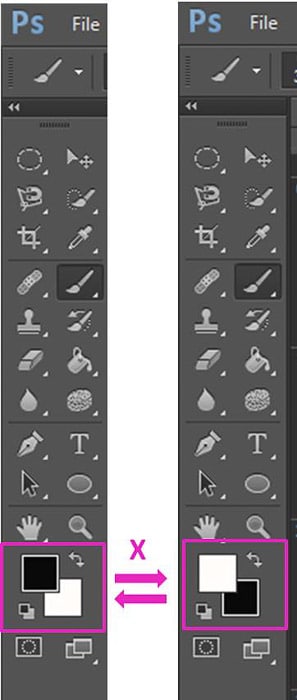
5. Quick Mask Shortcut
When selecting an area you can make local adjustments easily by using a quick mask. While having an area selected, press Q to activate the quick mask.
A red mask will appear outside the selected area.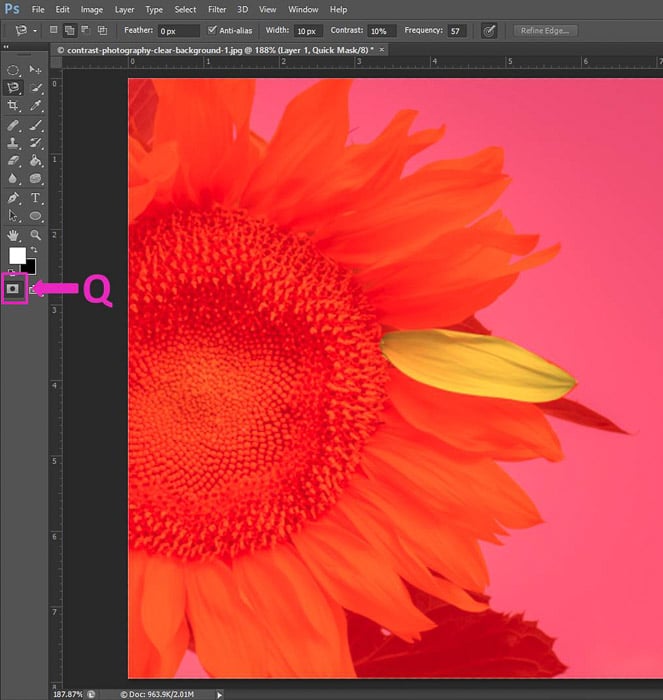
Using the brush tool (B) you can make changes in the selection.
If you paint in black you will add a mask and if you paint in white you will delete it (here is where the previous shortcut is useful).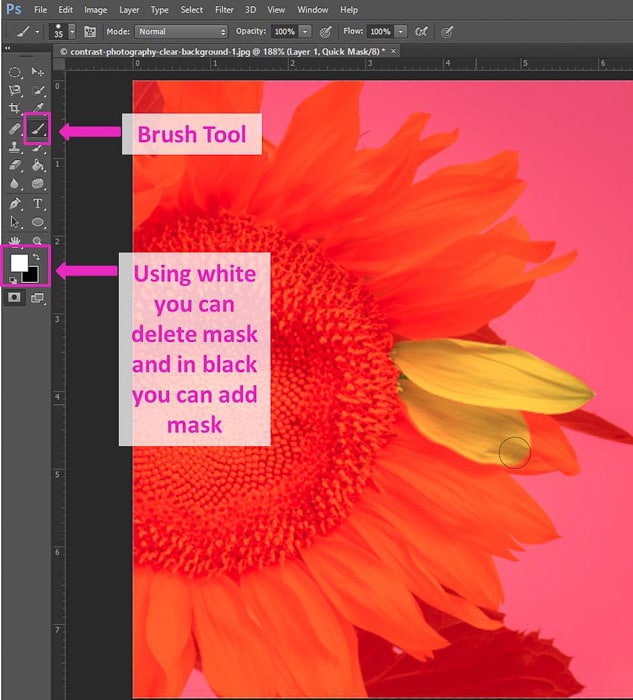
Press Q again to go back to the selection view.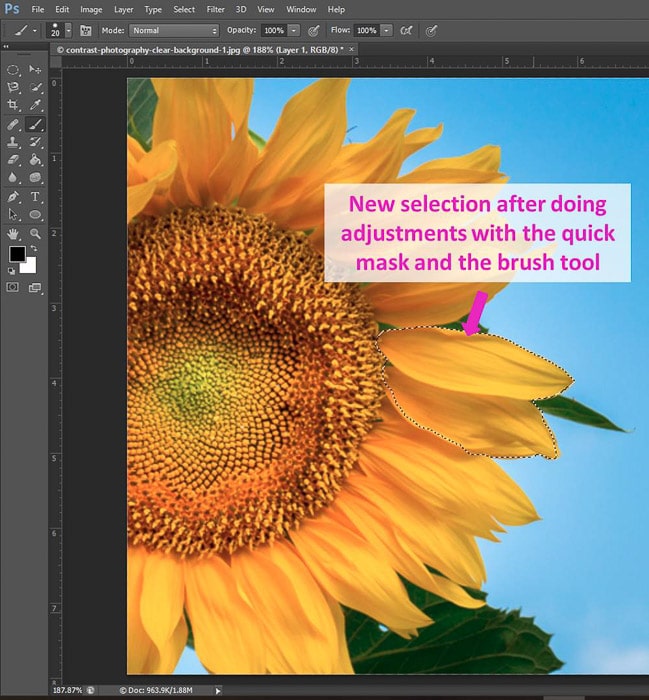
8. How to Deselect in Photoshop
If you have an area selected and you want to unselect it, press Ctrl+D for Windows or Cmd+D for Mac.
This shortcut works only when the selected area is active (when you still see the lines of your selection).
9. Invert Selection Shortcut
You can invert your selection using Shift+Ctrl+I (Windows) or Shift+Cmd+I (Mac).
10. Move tool shortcut
The Move tool is one of the basics. It allows you to move elements in your workspace.
It is useful, for example, when you are composing using several images or when making a collage.
Once you select the tool, you can move elements in 2 different ways. Drag them with the mouse or use keyboard arrows.
11. Crop Tool Shortcut
You might need the Crop Tool often, so learning its shortcut (C) will be really useful for your Photoshop workflow.
Once in the Crop Tool, you can select other handy features such as the straighten tool.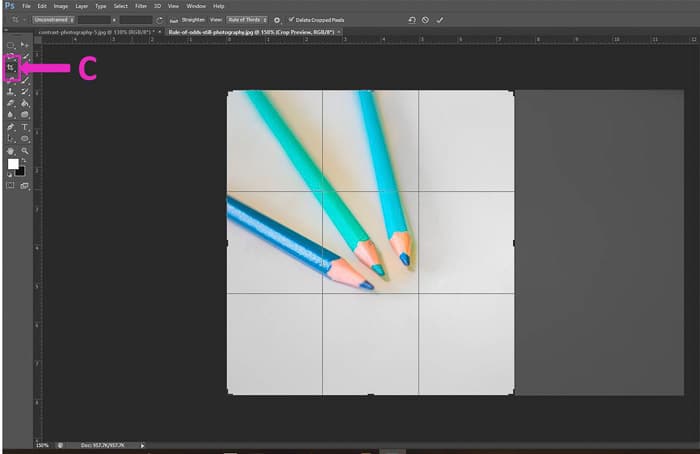
12. Clone Stamp Tool Shortcut
The Stamp Tool allows you to copy an area of an image and paste it into another part. Press S to access to the tool and your cursor will become a circle. As in the case of the brush tool, press ] y [ to make it bigger or smaller.
Copy an area by pressing Alt/Opt while you click on it (it is your target point) and then paint it in the place where you want to copy it.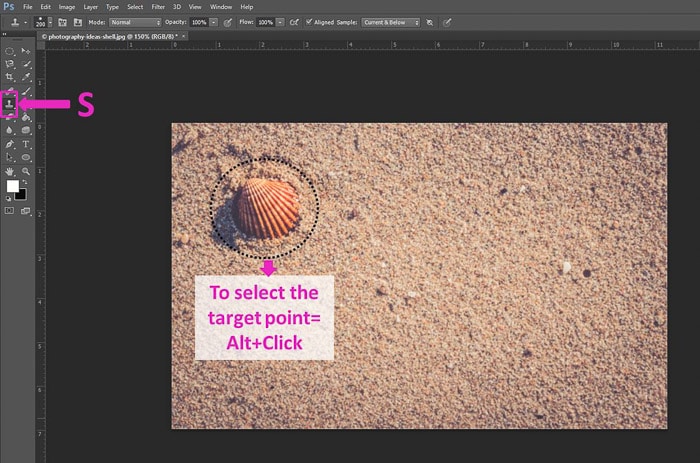
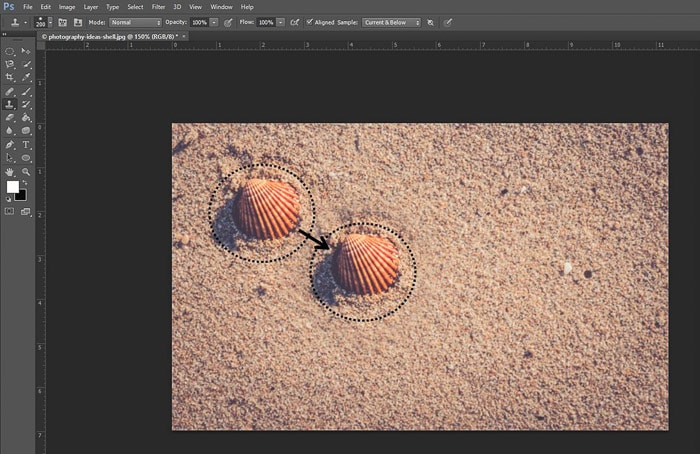
Check the Aligned sample box in the toolbar. This will make the target element follow your movement while painting.
13. Photoshop Zoom Shortcuts
There are several ways to Zoom in Photoshop. The fastest shortcut to Zoom in and Zoom out is pressing Ctrl+ to Zoom in and Ctrl- to Zoom out (Cmd+ and Cmd- respectively on a Mac).
If you just want to select the Zoom tool, then press Z and you access its tool bar options.
14. Fit Screen Shortcut
You can always Zoom out using the Ctrl –/Cmd- shortcut.
But you can do it even faster by pressing Ctrl+0 (Windows) or Cmd+0 (Mac).
The image will resize itself to fit your screen.
15. Hand Tool Shortcut
When you zoom in, you might need to move the image to see the surrounding areas. You can do it with the arrow keys, but a faster way is by using the Hand tool.
Press H to select it. Your cursor will become a little hand. Click and drag your image around however you need.
16. How to Undo
You can use the shortcut Ctrl+Z to undo your last step (Cmd+Z on a Mac). To undo multiple times in Photoshop, you might think you just need to press this repeatedly. That won’t work.
If you want to undo multiple times press Ctrl+Alt+Z (or Cmd+Opt+Z on a Mac) and you will step back through your History one step at a time.
In Edit>Preferences> Performance you can enter the number of History steps you want Photoshop to save. With a higher number you will be able to undo more steps, but it will also use up more of your computer memory.
17. How to Merge and Unmerge Layers Using Photoshop Shortcuts
If you are working with a lot of layers, you might want to merge them to reduce the size of your image files.
Select the layers you want to marge and press Crtl+E (Windows) or Cmd+E (Mac).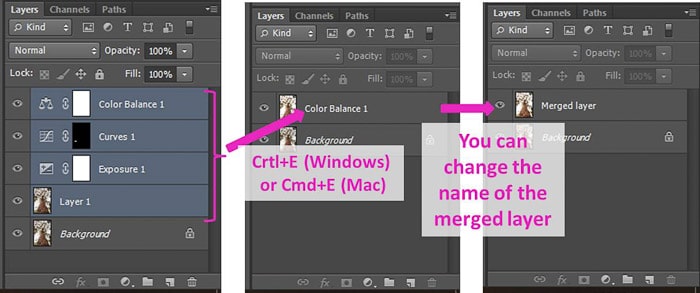
It is possible to unmerge layers before you save your file. If merging was your previous step, press Ctrl+Z/Cmd+Z to undo it.
If not, you can use the shortcut Crt+Alt+Z/Cmd+Opt+Z to go back through your History.
18. Image Size Shortcut
If you want to resize the image just press the shortcut Crtl+Alt+Q to access to the Image size dialog panel (Cmd+Opt+Q on a Mac).
You can change both the size and the resolution of your image. Remember though that if you make the image bigger, you will lose in the resolution!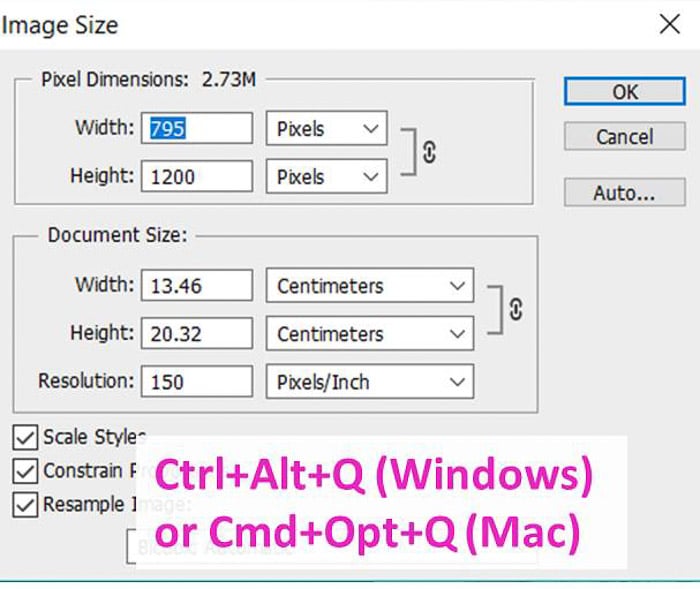
19. Save and Save As Shortcuts
To save your image quickly you can use two Photoshop shortcuts. For just saving it, press Crtl+S (or Cmd+S on a Mac).
If you want to access the Save As panel, press Shift+Ctrl+S (or Shift+Cmd+S) instead.
20. Shortcut for Photoshop Shortcuts
If you think that some (or all) Photoshop shortcuts are hard to remember and you would like to change them, you can do it!
There is a shortcut to access to the Shortcut dialog panel: Shift+Alt+Ctrl+K (Opt+Shift+Cmd+K on a Mac).
You can change the shortcuts under “Application menus”, “Panel menus” and “Tools”.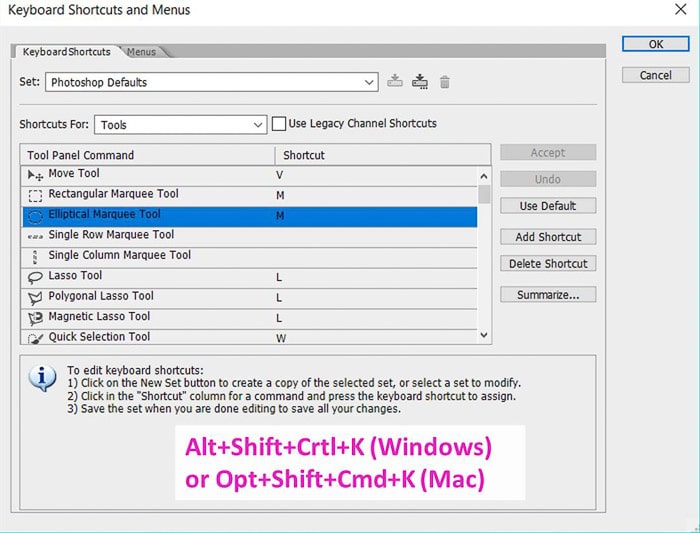
If your new shortcut is already in use, Photoshop will give you a conflict message in a dialog box.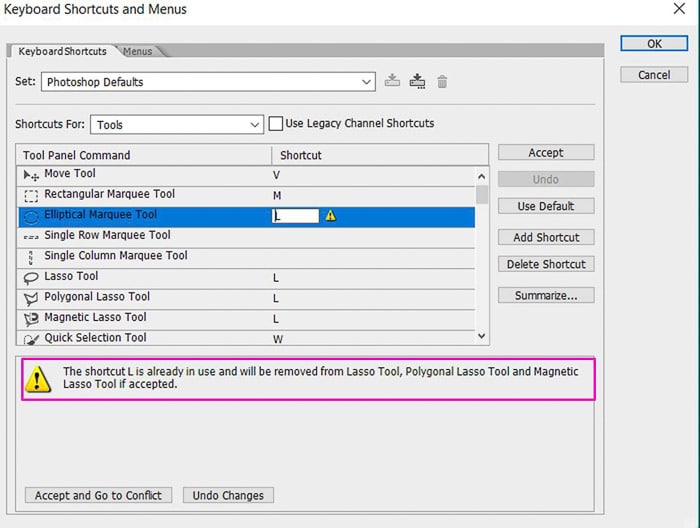
Using this, you can change default Photoshop shortcuts, like O for the burn and dodge tools.
Conclusion
Photoshop has a lot to offer, but with so many available tools and panels it’s easy to get lost.
Using Photoshop shortcuts can make your work more efficient (and your life easier).
It might take some time to get used to them but it’s definitely worth it.
Now check out our article on Photoshop actions, plugins and effects for more great tips!
And check out our articles on the Photoshop selection tool and clone stamp tool for more Photoshop tutorials.